1. Choose a Brand Name
Start with a name that clients can use to find you online or on social media. Pick a name that is short, straightforward, and simple to type. Avoid names that are too similar to ones that already exist. This will help you avoid losing visitors and money.
Utilize a service like Instant Domain Search or GoDaddy to determine whether your domain is available. Pick one of the comparable suggestions if the desired domain name is not available.

As a rule of thumb, try avoid names that are difficult to mention. This helps in making the brand easy to remember. The last thing you’d want to happen is for customers to not remember your brand name when telling their friends!
2. Select a website builder or an E-Commerce Platform
There are several platforms you can choose from for your company website. To choose the one that best suits your requirements and objectives, try using some of the trial accounts to have a feel for which one works best for you.
You can pick a CMS for e-commerce or use one of the e-commerce tools and extensions offered by several CMS systems. Consider your budget and read user reviews before choosing one for yourself.

Additionally, you want a platform that gives you access to top-notch CMS features and add-ons in addition to practical analytics and inventory tools. Easy integration with google analytics and other plug-ins should be part of your consideration.
Alternatively, it would be easier to use an E-Commerce platform like Shoppee or Lazada to help house your products. These platforms normally would be able to help promote your products as well when you participate in their various marketing campaigns monthly (ie: 11.11 day, Christmas Sale, Year End Sale, etc). The downside is that they do not have a dedicated page to house written content for blogs to use as content marketing and you are stuck with the layout and webpage design on the platform.
3. Select a theme
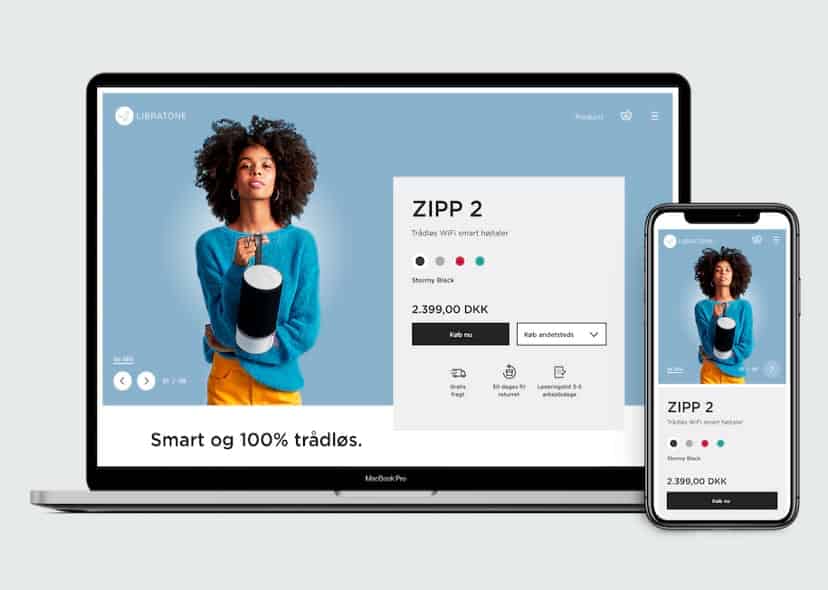
Next, it’s time to choose a theme for your store. A theme is a template that gives your store a consistent, sleek, and professional look.
There are many themes are designed to showcase specific product types.
Factors to consider when choosing a theme include:
- Good fit for showcasing your products
- Quick load times
- Mobile responsive – Able to reflect correctly on mobile devices
- Easy of use
- Good user reviews
- Cost (there are free and paid options to consider)
In many cases, you can apply a theme to your website with just a click or two. Depending on the theme and site builder you choose, you may be able to customize fonts, colors, and other aspects of your online store’s look.

Some sites like Envato Market provide an extensive selection of templates to choose from on a variety of web builders. This is further categorized according to different industries and can eliminate the need to filter though the many options. By selecting they type of templates and industry that you’d like, it can help find the right template for your business (or businesses).
4. Add product photos and descriptions
Product photos and descriptions are crucial to building a successful online shop. Your web customers won’t get to touch, feel, taste or try out your products before buying. Recreate this experience as closely as possible with high-resolution photos and detailed descriptions. The usage of videos could help sell on the features of the product.

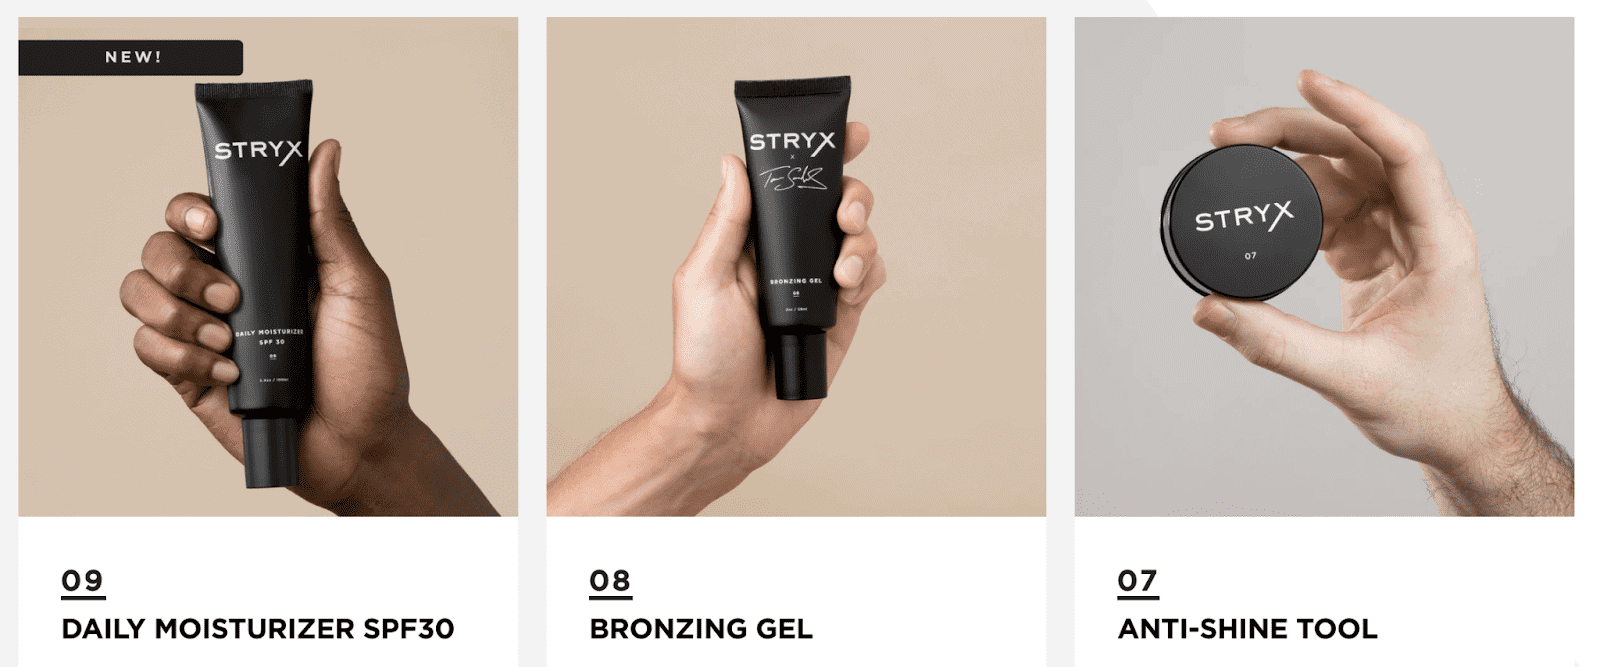
Stryx uses clean, simple photos and descriptions to display its cosmetics and skincare. Your product photos and descriptions should match your brand aesthetic and provide all necessary information to shoppers.
Showcase multiple photos from various angles, and include weight, dimensions, and special features. You can even feature video tutorials and demos. And remember to use SEO keywords in your product titles and descriptions to help interested shoppers find your products.
Clearly describe and show the appeal and value your products offer. Your photos and descriptions must make your products shine and convince consumers to make a purchase!
5. Create your other pages
The website store itself is the star of your show, but you still need to create your supporting pages. These include:
- Terms & Conditions
- About Us
- Contact Us
- Shipping & Returns
- You may also want to include a FAQ page, a sizing guide for clothing or shoes, media mentions, or even a blog. On every page you create, include your meta description and URL.
Well-written copy that reflects your brand voice helps you connect with your target audience and can boost conversions. Plus, answering consumers’ questions and concerns increases trust in your products and cuts down on customer service calls and emails.

In most site builders, adding pages is as simple as clicking Add Page in your dashboard. From there, an intuitive content editor should walk you through adding text and media.
If you aren’t sure where to begin, start with Terms & Conditions, FAQs, or similar, less daunting page types. Browse other online stores for ideas and inspiration for your main product pages.
6. Set up payment processing
Finally, you need to set up a way to accept payment. You can connect your website to iPay88 or RazerPay. Alternatively you can use international payment gateways such as PayPal or Stripe.
Before officially launching your store, make a test payment to ensure your system is functioning properly.
Below is a simple table to help compare the different services provided by payment gateway companies in Malaysia.
| Setup Fee | iPay88 SME Plan – RM 488 iPay88 Individual/SOHO Plan – RM 488 | FREE | FREE | Lite Plan: RM 499 Premium Plan: RM 400 |
| Annual Fee | iPay88 SME Plan – RM 500 (No Hidden Charge) iPay88 Individual/SOHO Plan – Waived | FREE | FREE | Lite Plan: RM 99 (waived for the first year) Premium Plan: RM 499 |
| Supported Currencies | RM only | International Currencies | International Currencies | RM only |
| Withdrawal Method | Transfer to local bank (weekly) | Transfer to local bank (weekly/monthly) | Transfer to local bank / visa cardPayment into Paypal Account Instantly. | Transfer to local bank (weekly) |
| Received money in local bank | ||||
| Supported cards | VISA and Master card, UnionPay, American Express | VISA and Master card, UnionPay, Link, Maestro, American Express | VISA and Master card, Discover, American Express | VISA card Master card, PayNet, MyDebit, UnionPay, Discover/Diners |
| Min amount for withdrawal | RM 100 | RM 5 | RM 40 | Startup: RM100 SME: RM100 |
| Application Approval Time | Within 14 working days (for internet bank transfer) 2 to 3 months (for credit card gateway) | Immediate | Immediate(Get Your Credit Card ready to verify your PayPal Account) | Credit Card: within 1 months Online Banking: 3-5 working days |
| E-Wallet Support | Alipay, Boost, GrabPayMAE(M2U), NETS, PrestoPay, Setel, ShopeePay, TNG, UnionPay, WeChatPay, GooglePay | GrabPay, ApplePay, Click To Pay, GooglePay | N/A | TNG, Boost, GrabPay, ShopeePay, MAE (M2U), WeChatPay, AliPay, DuitNowQR, Crossborder |
| Ecommerce Platform Integrations | Shopify WooCommerce, EasyStore, cubecart, Ecshop, Ecwid, Interspire, JustSimple, AdobeCommerce Cloud, Opencart, Oscommerce, Prestashop, Shopex, Shopmatic, Sitegiant, Ubercart, VirtueMart, webShaper, Whmos, Zen cart | Shopify, WooCommerce, EasyStore, Squarespace, Magento, RapidCloud, VirtueMart, Opencart, PrestaShop, Zen cart, J2store, Shoptimize, Oscommerce, Zenoti, HikaShop, myBizCart | Shopify, WooCommerce, EasyStore, Squarespace, Magento, RapidCloud, VirtueMart, Opencart, PrestaShop, Zen cart, J2store, Shoptimize, Oscommerce, Zenoti, HikaShop, myBizCart | Shopify, WooCommerce, EasyStore, Avana, Cs.cart, Cubecart, Drupal commerce, EasyStore, Ecshop, eStore, Shopline, Instant store, Interspire, Magento, Net Shop, Opencart, ShopEx, Sitegiant, VirtueMart, Web Ninja, Web shaper, Xcart, myBizCart, Pres |
Depending on your needs, you may need to engage more than one gateway provider if you are setting up a business to be sold to customers beyond Malaysia. But once you’re ready to accept payments, you can publish and start marketing your online store!
PS: Don’t Forget to Choose The Right Logistics Partner!
It is easy to overlook but choosing the right partner to help ship your product over to your customer can often make or break a business. Try our mobile platform to help ship your parcels while on the go!
Check out our article here in order to learn more tips for starting your own business as a beginner or if you don’t know how to start!


